


Enter all the desired criteria: the apps that satisfy them all will be searched; if a criterion is specified multiple times, only the last occurrence will be considered.



























































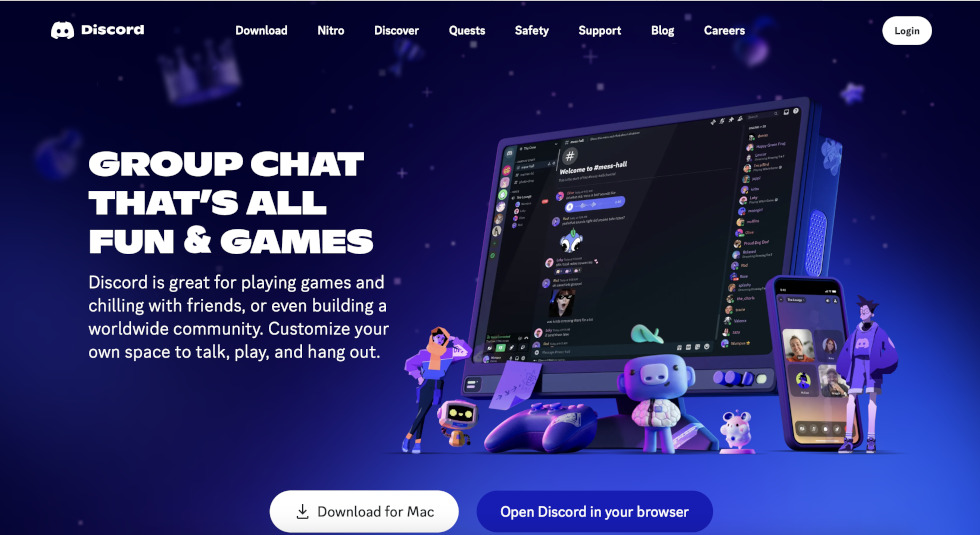
This is the Discord home page as seen from a desktop browser. From here, you can download the app for your operating system, use it directly in your browser, or get the mobile version. In this case, the browser version is shown. To use the web app, click "Open Discord in your browser", which allows you to enter by simply choosing a user name. Once logged in, the platform will ask if you want to create your own server or join an existing one. Please note: if you do not complete your registration via email (or phone number on mobile devices), your account and any changes made will not be saved to the cloud and will be lost once the session ends.
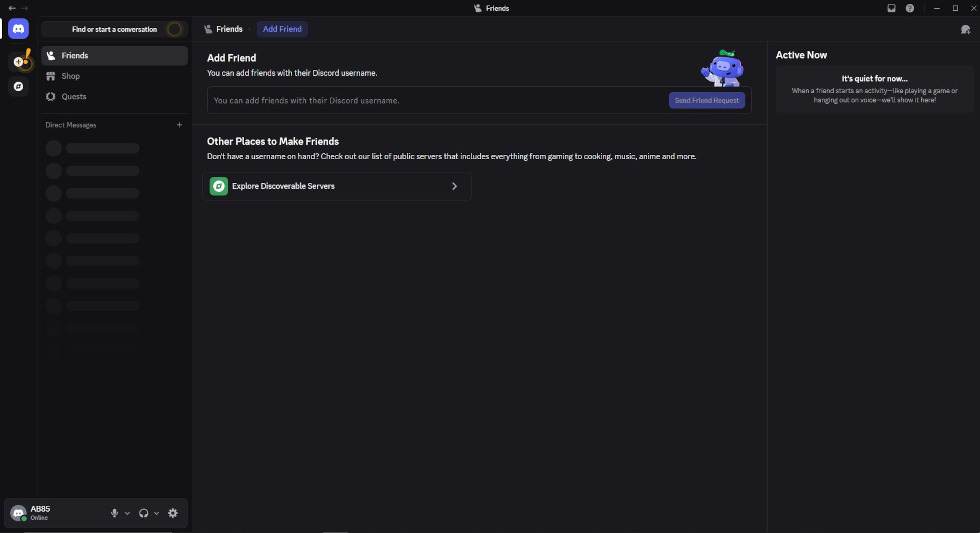
This is the account dashboard, where you can view your friends list and their current status. The "Add friend" button allows you to send new friend requests. The "Direct messages" section hosts private chats with individuals or groups, while the right side of the screen shows the real-time activity of online friends. The sidebar on the far left contains navigation controls, the option to create new servers, and the list of servers you have already joined.
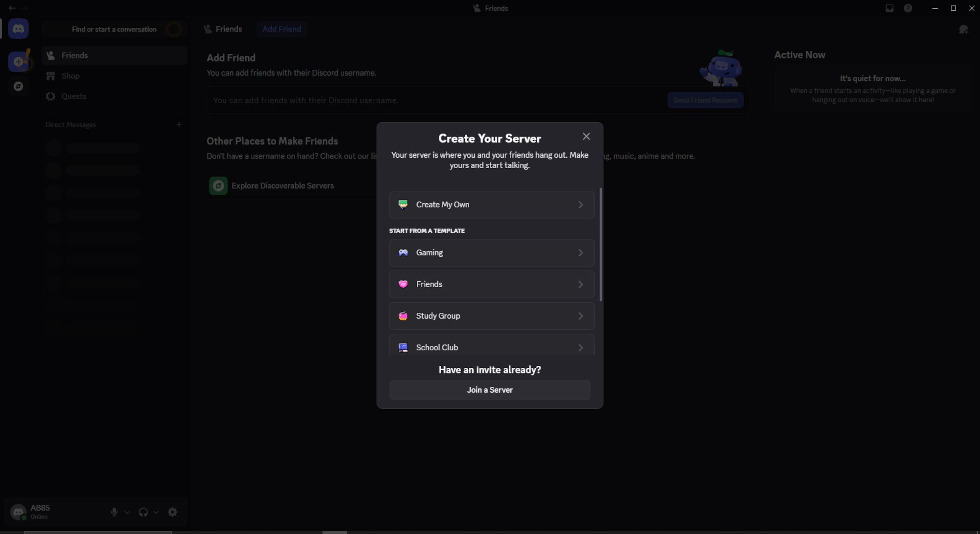
This is the server creation screen. The application allows you to create a custom server from scratch or choose from a list of templates based on your needs. Next, you will be asked if the server is intended for a public community or a small group of friends. The final step is to name your server and, optionally, upload an icon.
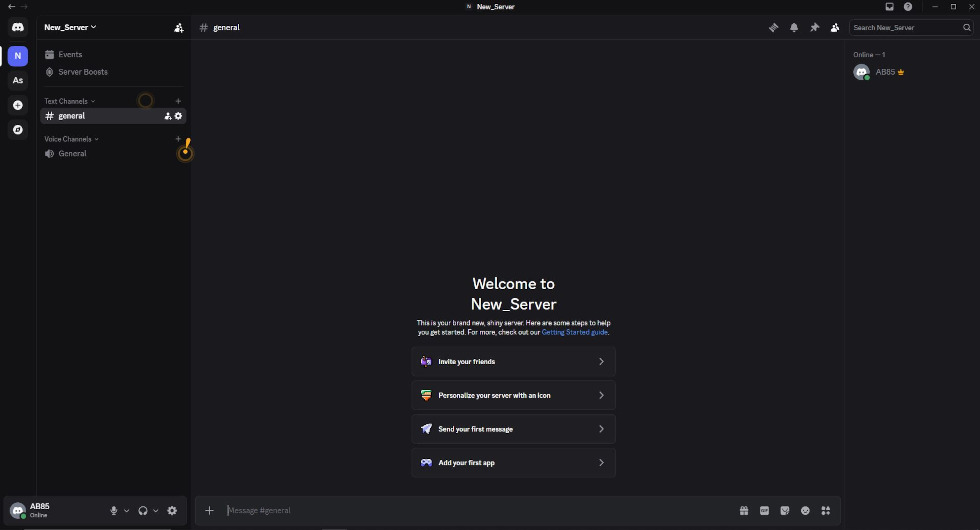
This is the main screen of a custom server. Each server is organized into text and voice channels, listed in the left-hand menu. The central part displays the content of the selected channel: message history in text chats, or partecipant avatars in voice channels. On the right, you can see the member list, divided into online users (grouped by role) and offline users, sorted alphabetically. The application immediately suggests quick actions, such as inviting friends. By clicking on the "+" icon, you can create new channels and organize them into customizable categories. The two types of channels are distinguished by different icons: a hashtag (#) for text channels and a speaker icon for voice channels. In voice channels, users can enable their cameras or start live streams to share their screen with others. Finally, advanced server managemente - including defining roles, persmissions, and access - is handled via the dropdown menu at the top left under "Server Settings".
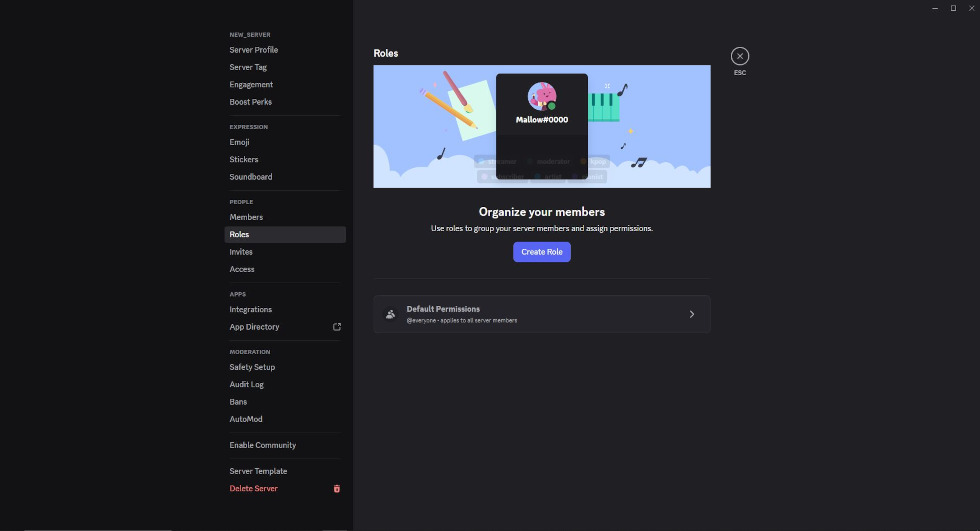
After creating the server, you can access the settings to organize members using the 'Roles' menu. This section allows you to group users by assigning them specific permissions, distinct colors, and hierarchical positions within the member list.
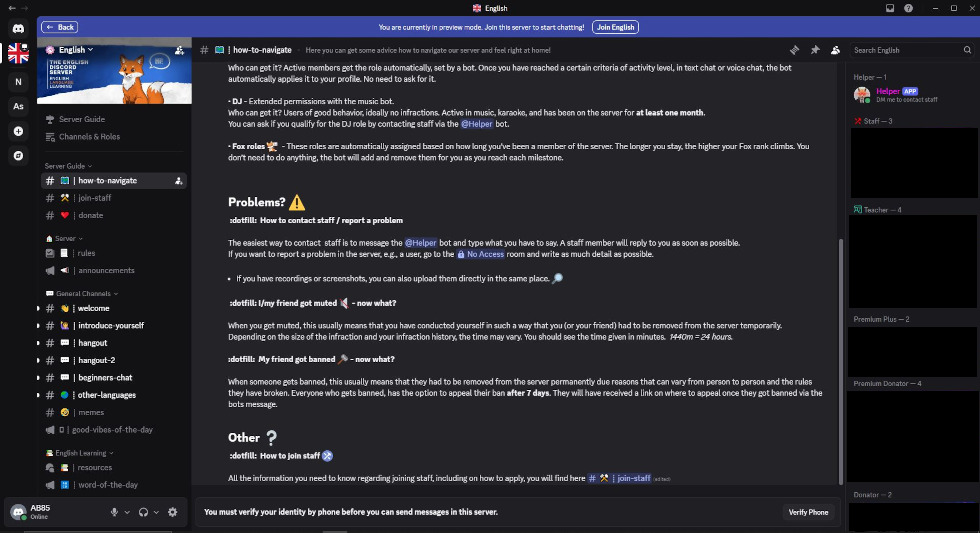
Below is an example of a public Discord server. The interface is identical to that of private servers, the main difference is that a public server can be found using the "Explore" function. This feature is accessed by clicking the compass icon located in the sidebar on the far left of the Discord window.
The potential of Discord in the fields of education and community building - among students, enthusiasts or professionals - is multifaceted:
Groups managementCollaboration & CommunicationChatBots & virtual assistantsDesigning & PlanningShared whiteboards
 4.6/5
4.6/5
 5
4.8/5
5
4/5
5
5/5
5
4.5/5
5
5
4.8/5
5
4/5
5
5/5
5
4.5/5
5
 Add comment











Copy link