


Enter all the desired criteria: the apps that satisfy them all will be searched; if a criterion is specified multiple times, only the last occurrence will be considered.

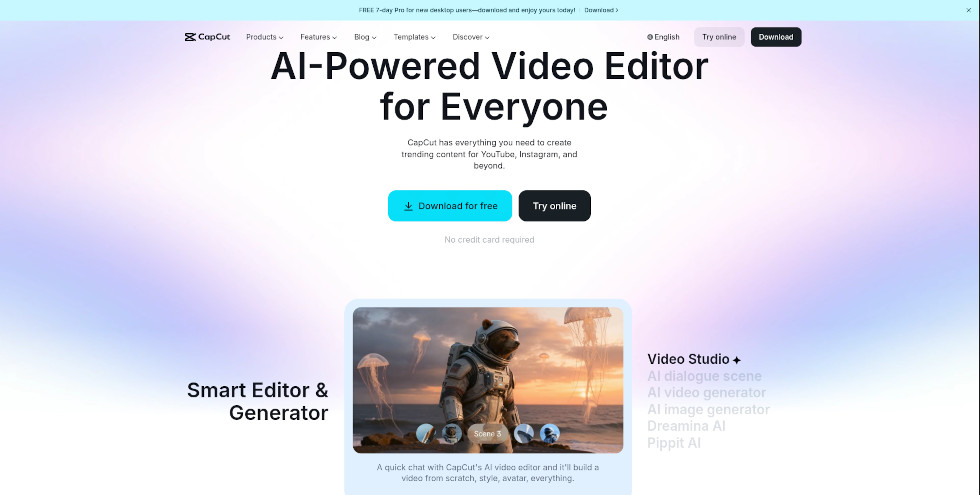
This is the CapCut home screen, where you can download the app (for macOS or Windows), or choose to use the online service. In either case, you will need to register or log in.
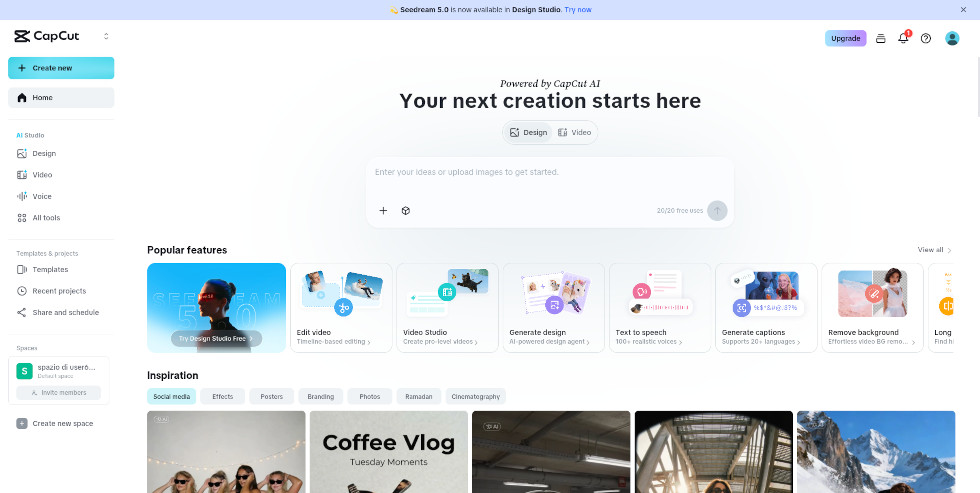
This is the account Dashboard. From here, you can start a new video editing project by selecting your preferred format via the 'Create new' button. Alternatively, you can use the central text box to describe your idea: for example, by entering 'A video explaining the water cycle with nature footage and relaxing music', the AI will generate the project for you using the 'Nano Banana' or 'Seedream' models.
Just below the text area, the 'Popular features' are highlighted, providing quick access to the most frequently used tools. By scrolling down the page to the 'Inspiration' section, you can browse a selection of ready-made templates that can be customized to suit your specific teaching needs.
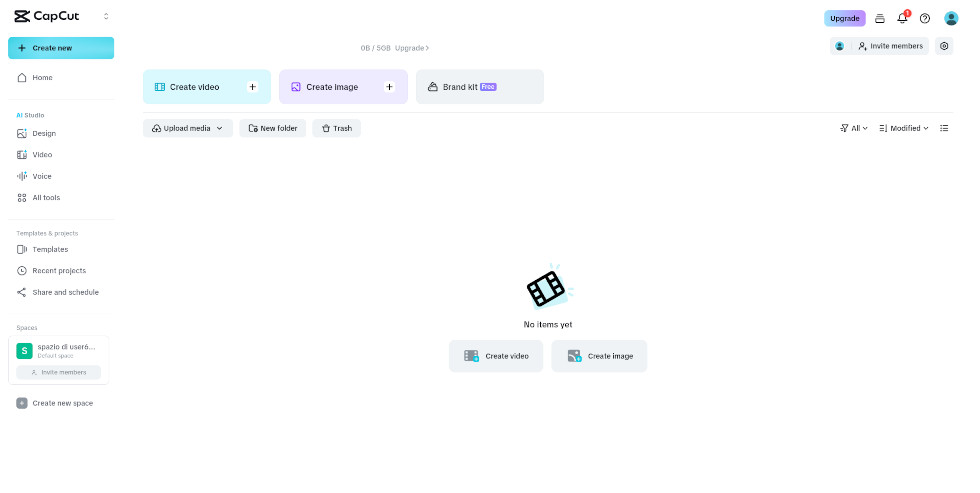
The "Create a new space" submenu allows you to access the collaborative workspace. Here, you can upload projects to the cloud , taking advantage of 5GB of free storage (which can be increased by subscribing to the 'Pro' plan). Within this personal space, projects can be edited either individually or in collaboration with other invited users. This is made possible by the 'invite member' button located in the top right corner.
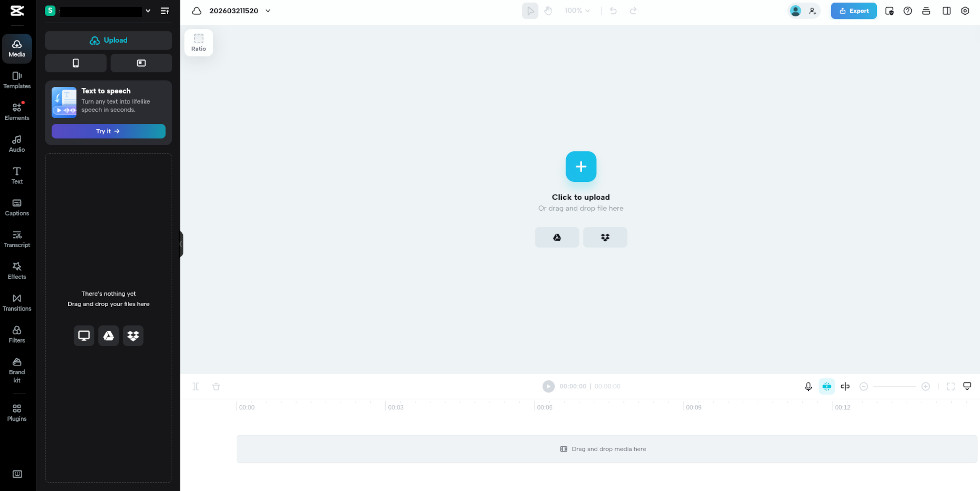
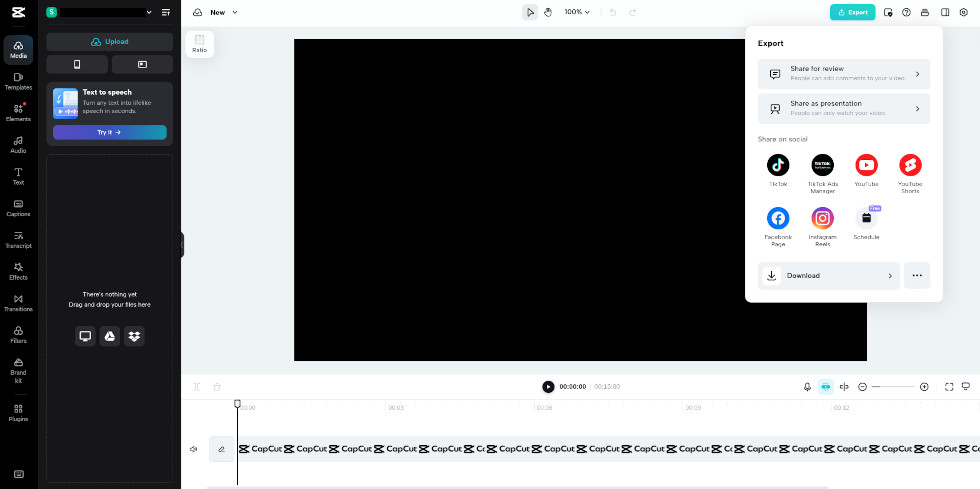
After clicking 'Create new', you will enter the editing screen where you can begin building your video. The left sidebar lists the various editing sections: from here, you can upload your own media files, use preset layouts and templates, adjust audio, text, subtitles, and transcriptions, as well as insert effects, transitions, filters, and any additional plugins.
The center of the screen features the project preview, allowing you to view changes in real time. At the bottom, you will find the timeline: this tool is essential for managing the individual elements that make up the video, enabling you to cut, move, and synchronize them with precision.
Once the editing is finished, you can proceed to share or save your work by clicking the 'Export' button located in the top right corner. The system offers several options: you can generate a project link to send to other users, or share it directly as a presentation or on social media channels. Alternatively, you can download the video to your device by customizing the file name and technical parameters, such as resolution, quality, and frame rate. At this stage, you also select the export format, typically choosing between .mp4 and .mov. After confirming these preferences, a final click on 'Export' will allow you to permanently save a copy of the finished product to your storage space.
CapCut is a versatile tool that can be used for educational purposes to:
 Video making & enrichment
 AnimationsAudio & podcastsA.I. toolsTranslations & transcriptions
 Presentations
 4.3/5
4.3/5
 5
4.4/5
5
4.2/5
5
4.3/5
5
3.9/5
5
5
4.4/5
5
4.2/5
5
4.3/5
5
3.9/5
5
 Add comment
















Copy link