
Enter all the desired criteria: the apps that satisfy them all will be searched; if a criterion is specified multiple times, only the last occurrence will be considered.
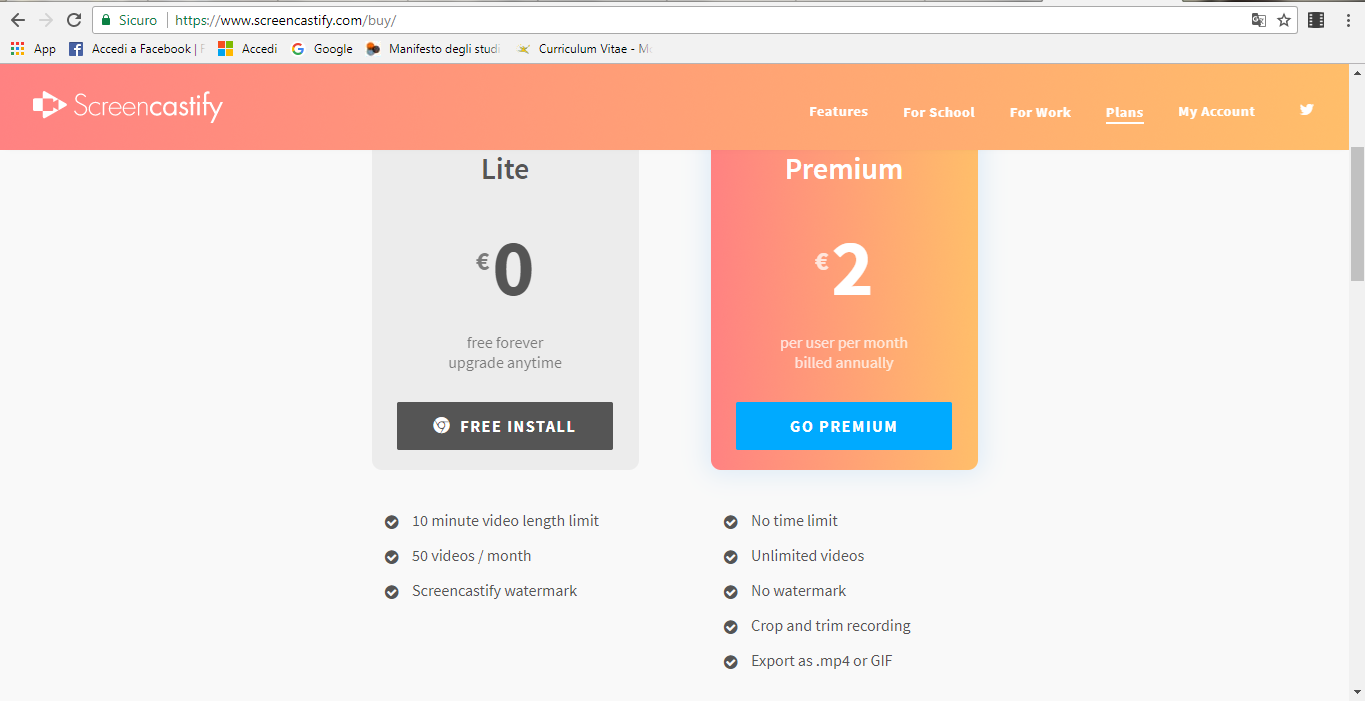
 Page related to payments and prices: you can choose the “Individuals” or the “Schools” packages. The “Individuals” package consists of a “Lite” version and a “Premium” version: the “Lite” version is the free version that allows you to create up to 50 videos a month with a maximum duration of 10 minutes each and that have the Screencastify watermark on them; the “Premium” version is a the paid version that doesn’t have limits on the length of the videos or on the number of them; these are also not marked by the Screencastify watermarked and can be exported in MP4 or GIF format. They can be modified or cut.
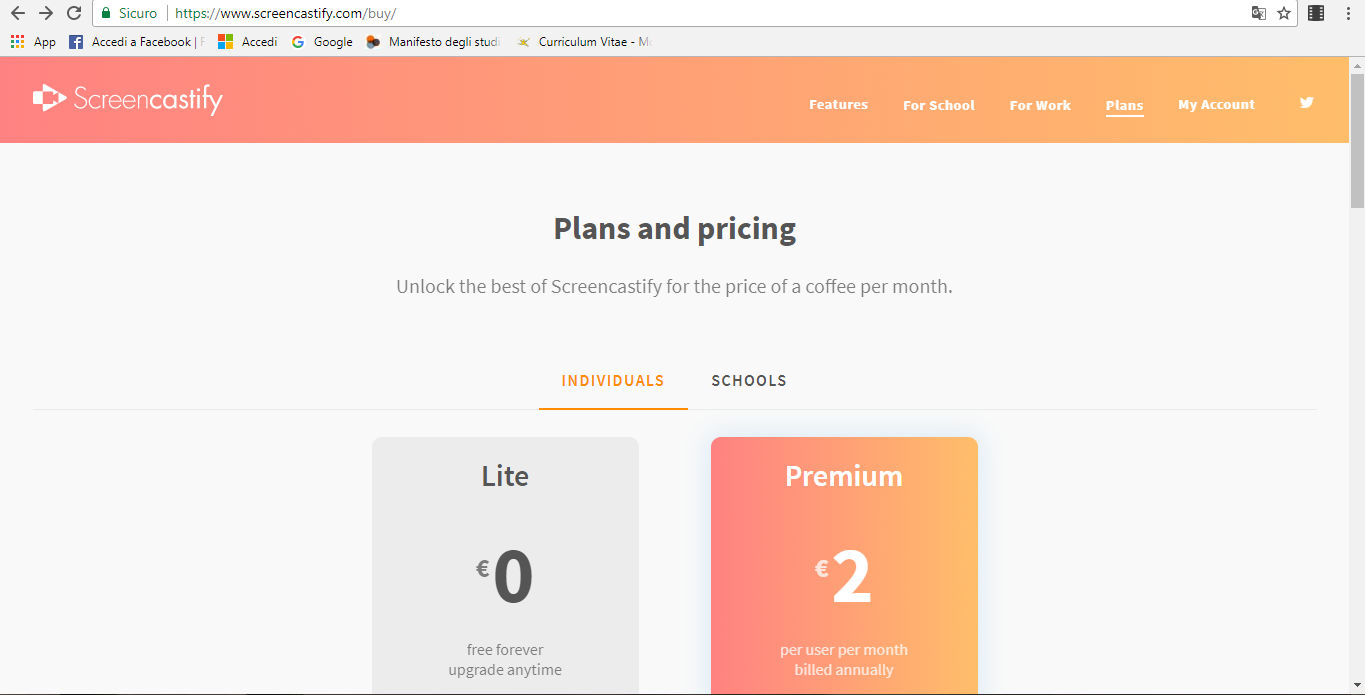
 On this page you can choose where to archive your videos: on Google Drive or on Screencastify.
  If you choose to save your video on Google Drive, you must sign in into your Google account by clicking on “Sign in”.
 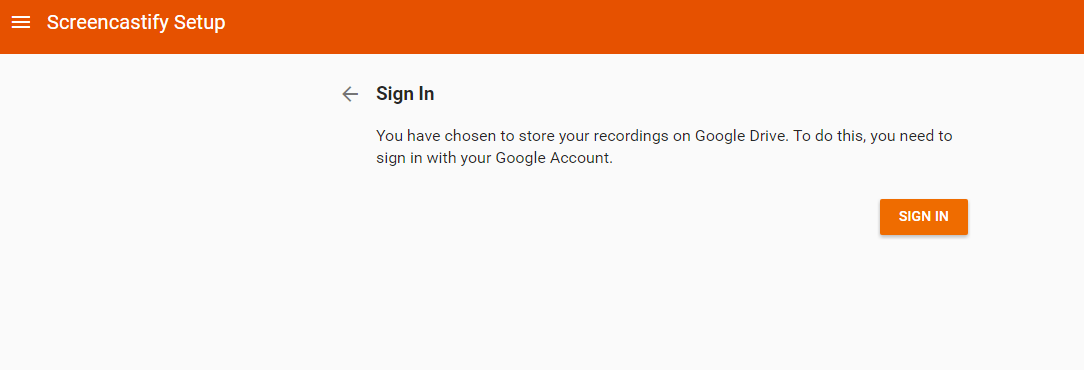 This page collects all the video that you save on Screencastify.
 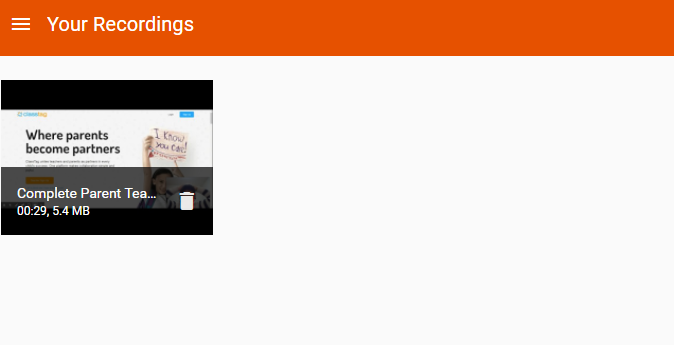 The following page shows what the toolbar looks like that you can use to record your video; it’s made up “Tab”, “Desktop” and “Cam” (which will only be visible if Screencastify finds a webcam connected to the computer). The “Tab” option allows you to record only what is happening on the single Chrome tab: the one we have started the recording from. If other tabs are opened, they will not be recorded. The “Desktop” option allows you to register anything that happens on the screen (including what is outside of the browser). The “Cam” option allows you to record what is frames by the webcam. In the “Desktop” option, under “Audio”, you will find “Microphone” (when Screencastify finds a microphone connected to the computer). You can choose whether or not to include a microphone recording by ticking the “Microphone” box or not. You can also decide whether or not to include the system sounds by clicking on “System Audio”. Under “Video” you can add the recording from your webcam by clicking on “Embed webcam” and you can see the preview of what is recorded by clicking on “Show preview window”.
 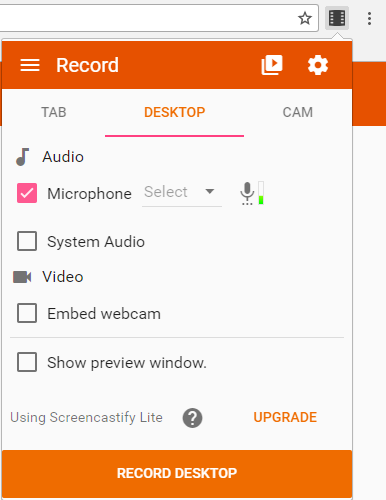 In the “Tab” option there are the same options that there are in “Desktop” with the same functions.
 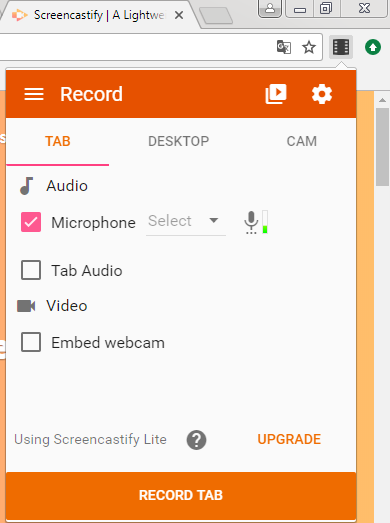 The “Cam” option has the same options and functions as “Tab” and “Desktop”.
  The following are the drawing instruments that you can use during a video recording. The “arrow” options allows you to use a bigger cursor that is more visible than the white cursor during a video recording. The “pen” option allos you to draw on the tab during the recording; you can choose the colour and the thickness of the pen strokes. The “rubber” options allows you to rub out what you drew with the “pen” option.The “square” option allows you to restore the tab to its initial look.
  By clicking on the icon in the top right near the Chrome search bar, you can open the following table that allows you to pause, stop and start the video.
 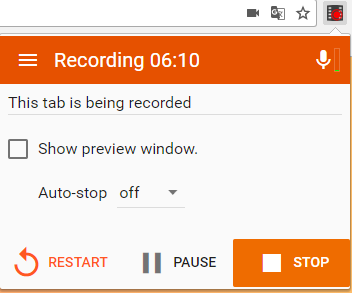 Once you’ve finished recording, the video will appear on this page.
 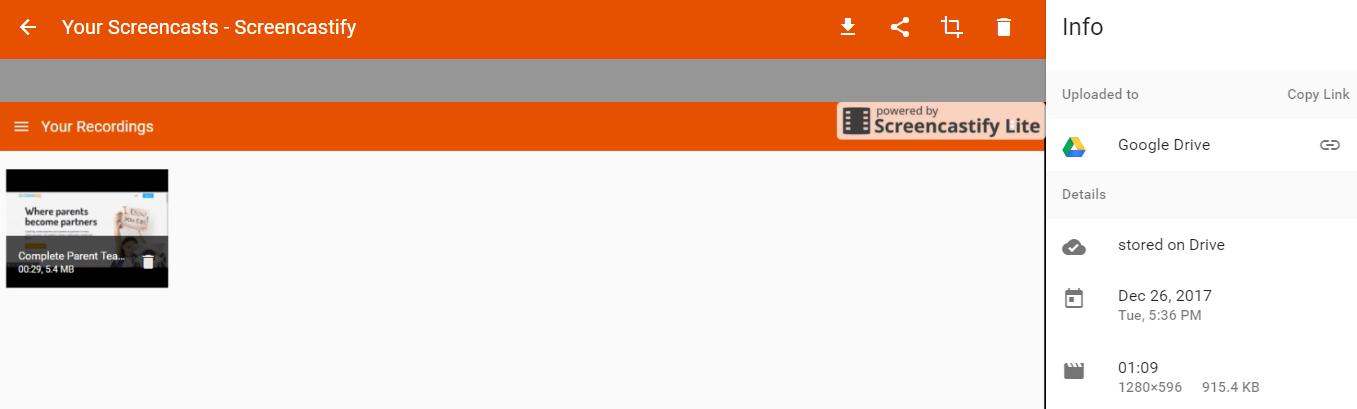 You can also choose to share your videos on Google Drive or YouTube.
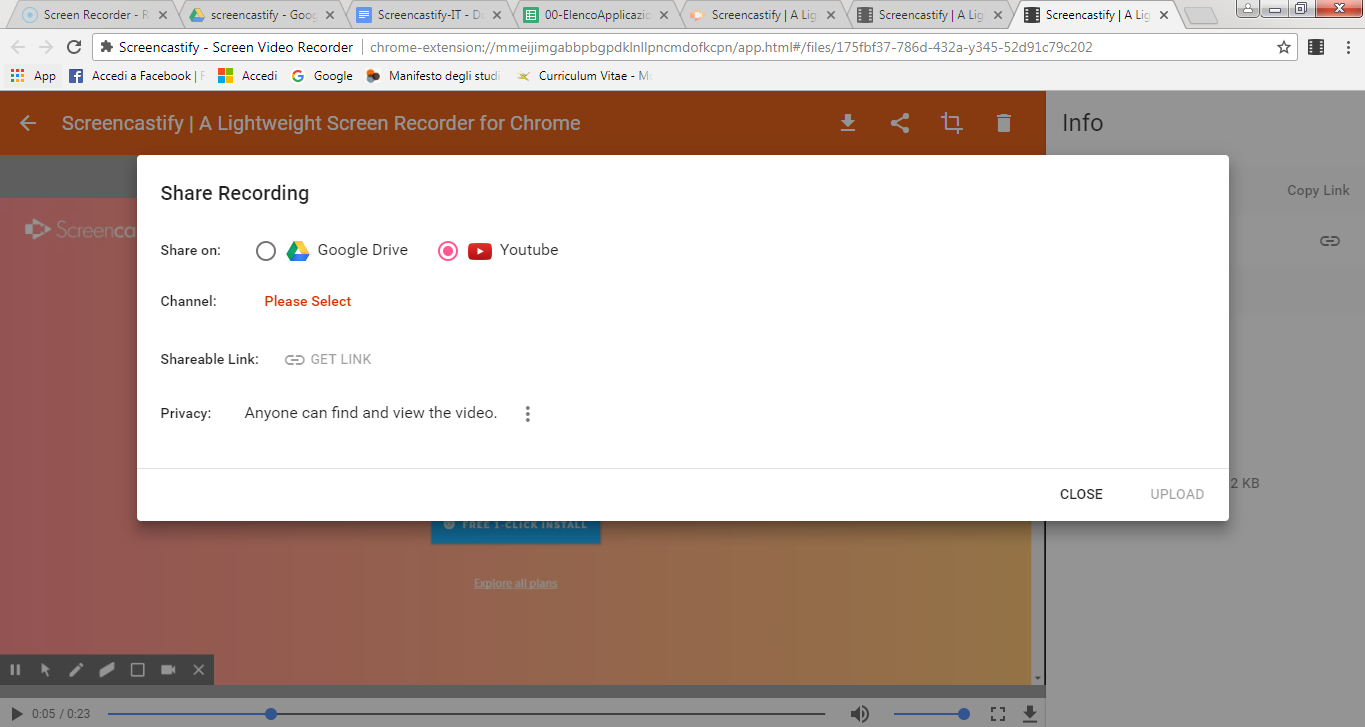


Copy link