
Enter all the desired criteria: the apps that satisfy them all will be searched; if a criterion is specified multiple times, only the last occurrence will be considered.
 But before being able to create an app it is required the authentication through your Google account. Once you access the environment is easy and intuitive, the prevalent colors are green and grey. You can see a series of menu on the superior part of the screen: Project (to manage the different projects), Connect (it will allow you to connect with your own Android device to use the created app), Build (it allows you to create the app to install on on your device), Help (guide to App Inventor). It is possible in this superior bar to set the language you prefer, there are available 11.
 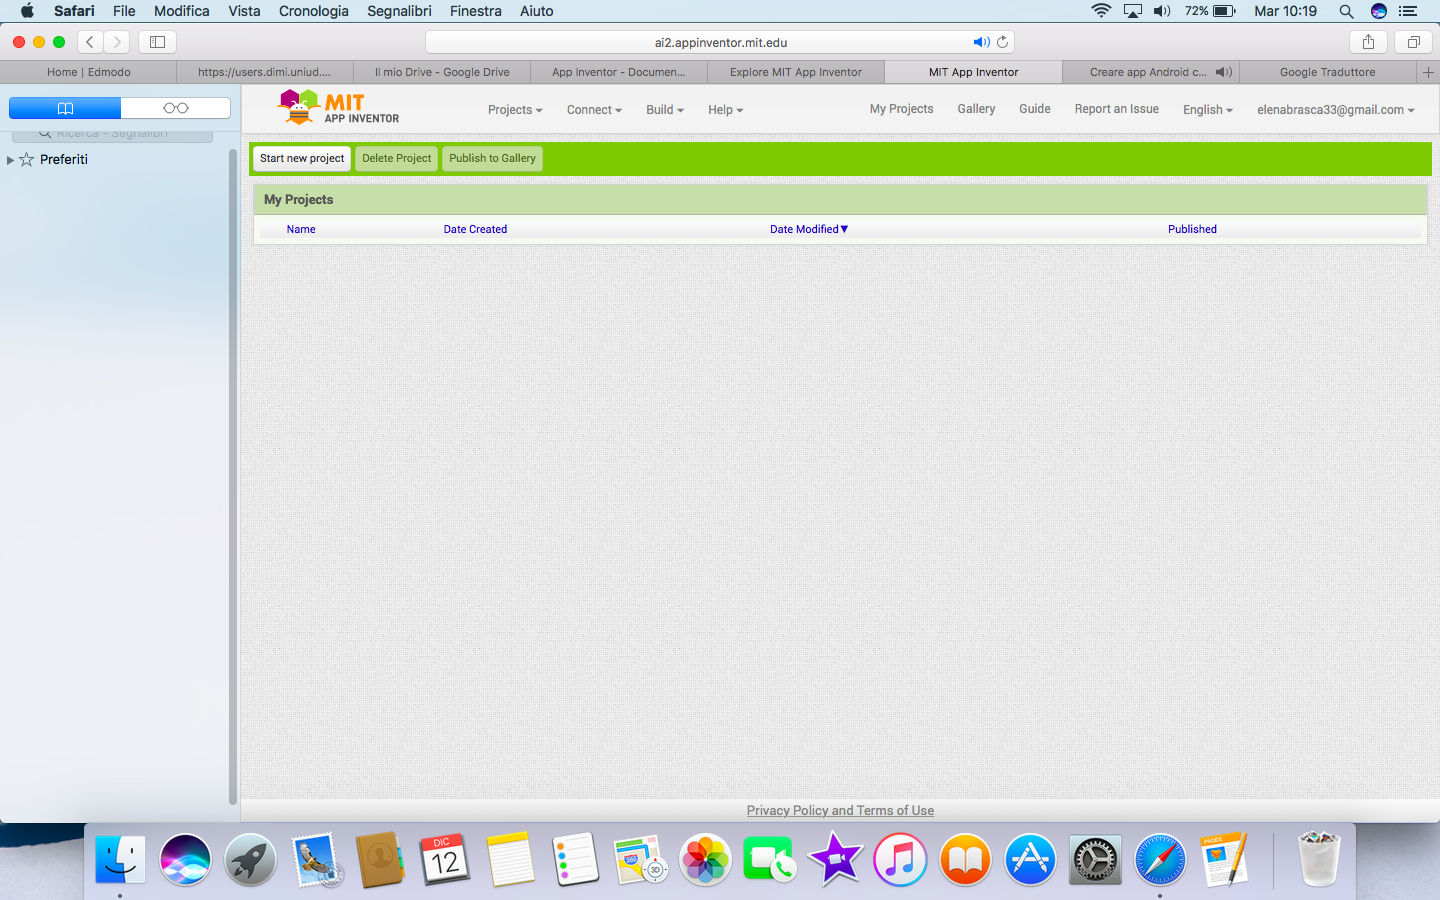 Immediately below the superior bar of the menu, there are present three buttons: Start New Project, Delete Project and Publish in Gallery. Clicking on the button Start New Project it will start the effective creation: it will be required the title of the new project that will be saved in the dashboard of the user “My Project”. GRAPHIC ENVIRONMENT: DESIGNER After entering the creation environment, the screen is divided in sections: one on the left, the Palette, containing all the controls for the creation of the interface of the app, divided per categories; a central section Viewer, that visualizes the current aspect of the interface of the app that is being created and in which it is possible to insert the different controls of the palette; one section known as Components, which summarizes all the controls of the Palette already inserted; below there is an ulterior section known as Media which contains all the multimedia contents (sounds etc..) uploaded by the app, allowing to add new files. At last the section Properties which allows to see the property of the content selected in which you can make changes.
 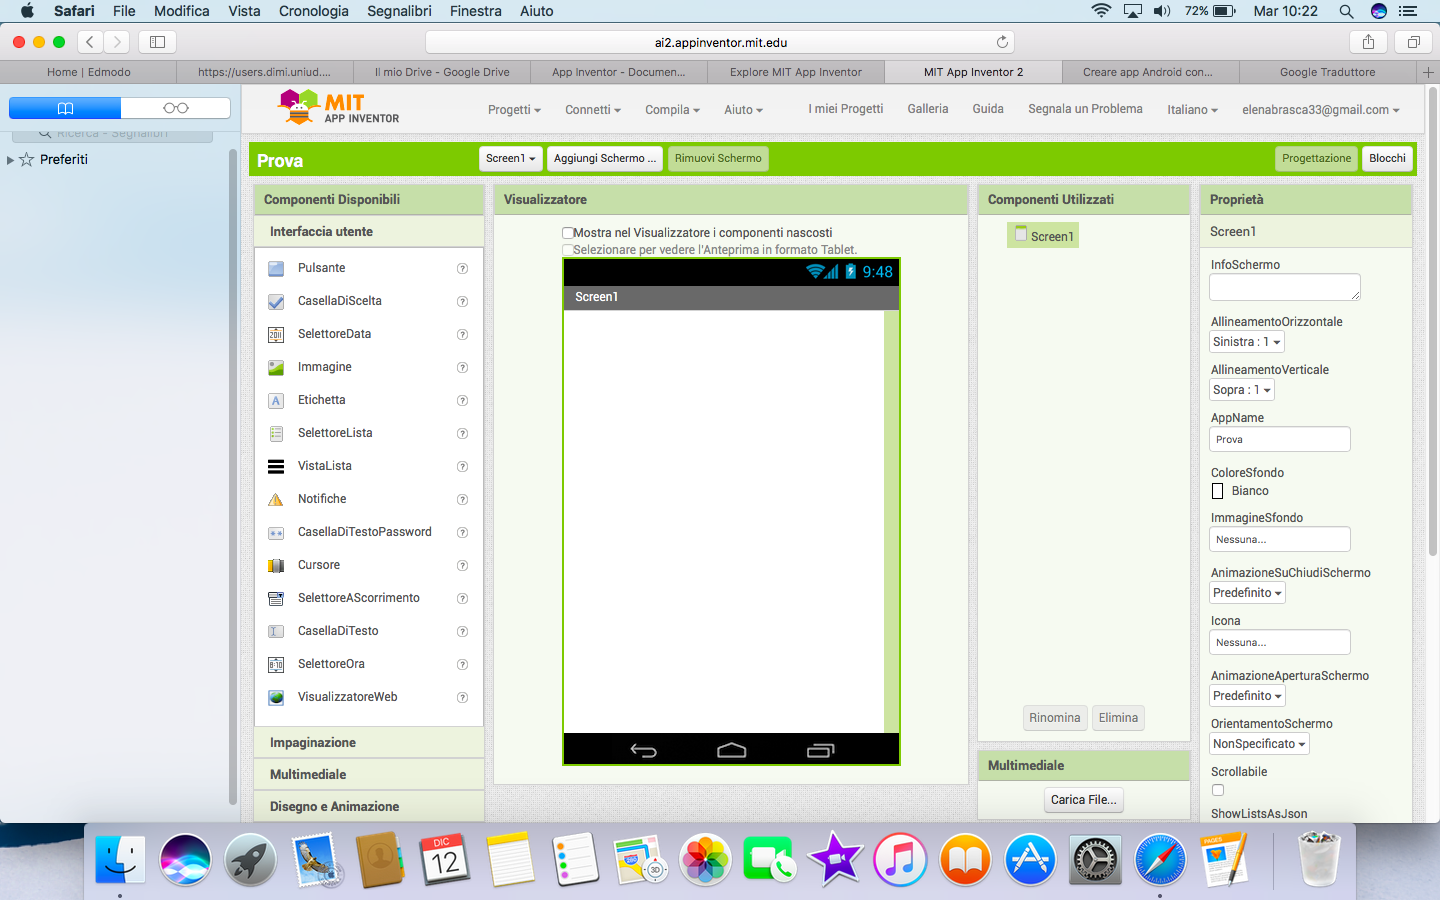 PROGRAMMING ENVIRONMENT: BLOCKS The programming environment is accessed by clicking on the button “Blocks” situated up on the right. It is divided in two sections. The left section contains a series of blocks which will allow you to create the app. The blocks are divided per categories: the ones of the “Build in” category are a lot; they are instructions and objects of general use, subdivided per categories distinguished per color in base of the functions of the programming (ex. Text, Control, etc). The particularity of these blocks is that they are used as pieces of a puzzle, which have even the aspect nice and captivating, which are going to wedge in between them creating in this way a programme. Immediately below the category “Build in”, we can find the blocks regarding the controls inserted effectively in the DESIGNER environment, indicated in the category Screen. The right section, the Viewer allows to visualize the various sequences of the code that forms the app which is being created. It is also present an image of a basket, through which you can easily delete a group of instructions previously inserted. It is in this section that the various blocks of programming will be united as pieces of a puzzle in order to form all the functions/actions predicted by the app.
 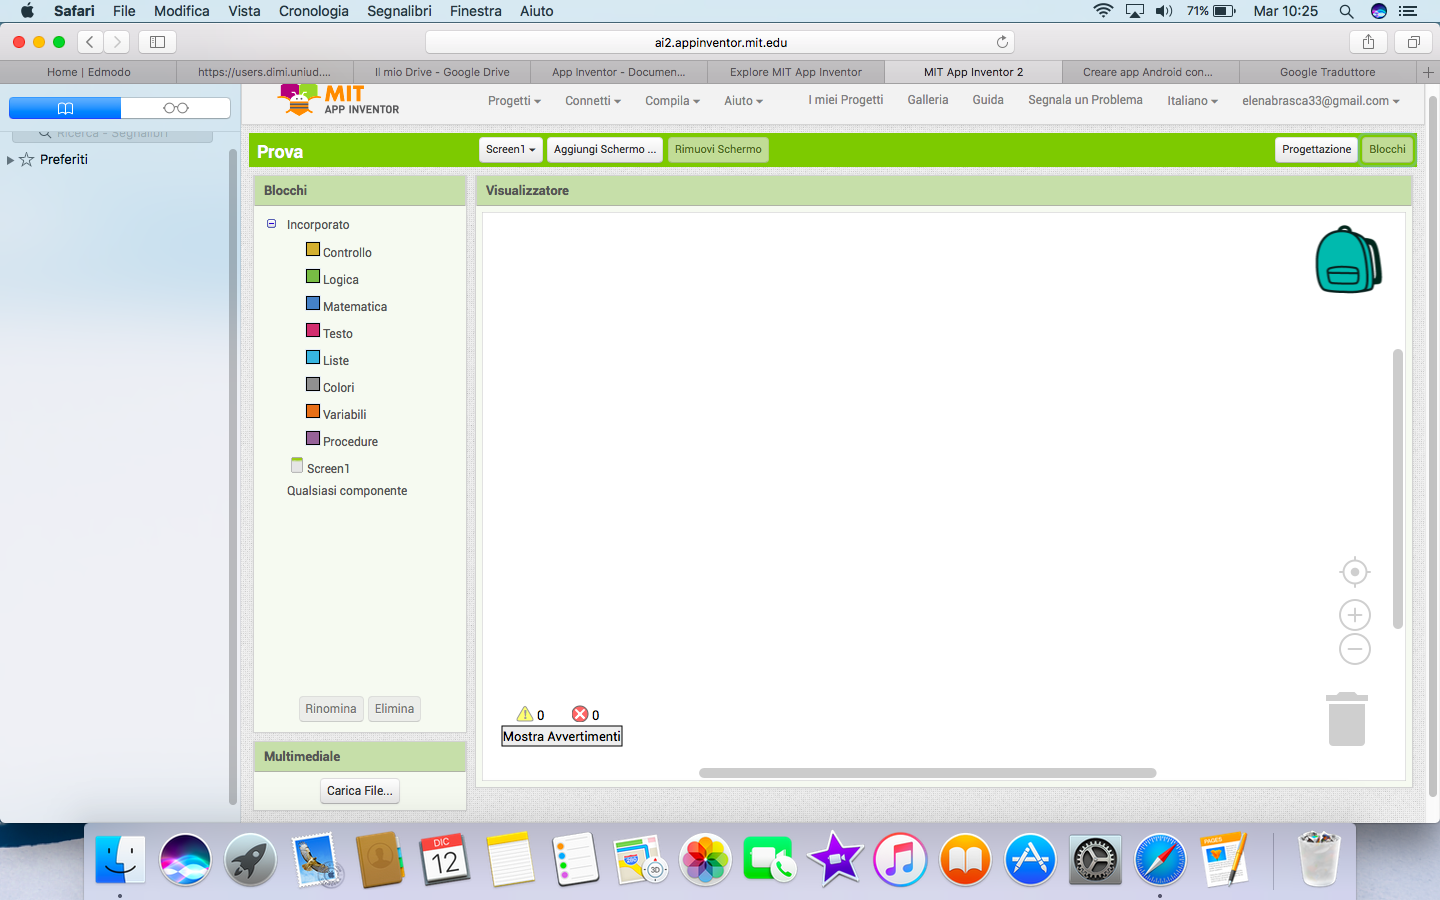 It is possible while using it (once you insert the components and blocks of programming), to verify that the app properly works, based on the intentions of the user. It is necessary to download on your own device an app that directly connects with App Inventor: MIT Companion, which allows you to test the functions in progression. Once downloaded and opened it necessary to select from the computer, from App Inventor, the item Connect and select Al Companion. It will generate a QR Code which will be scanned through the mobile device, in which it will be visualized the app in phase of creation. Once created in the superior bar of the menu, clicking on Build, it will be possible to create an app and save alson the apk files of the app on your computer.


Copy link