
Enter all the desired criteria: the apps that satisfy them all will be searched; if a criterion is specified multiple times, only the last occurrence will be considered.
 After registering the work and discussion management area will appear.
  To create a new discussion will be sufficient to click on "new grid" and will appear the following screen where you have to choose the type of community that can access to our discussion (allows you to implement greater control with regard to access), give a title to the discussion, create the Flip Code related to it and choose to customize it through image. Once this is done you can share the discussion through QR code by downloading and sending it to participants or sharing the Flip Code.
 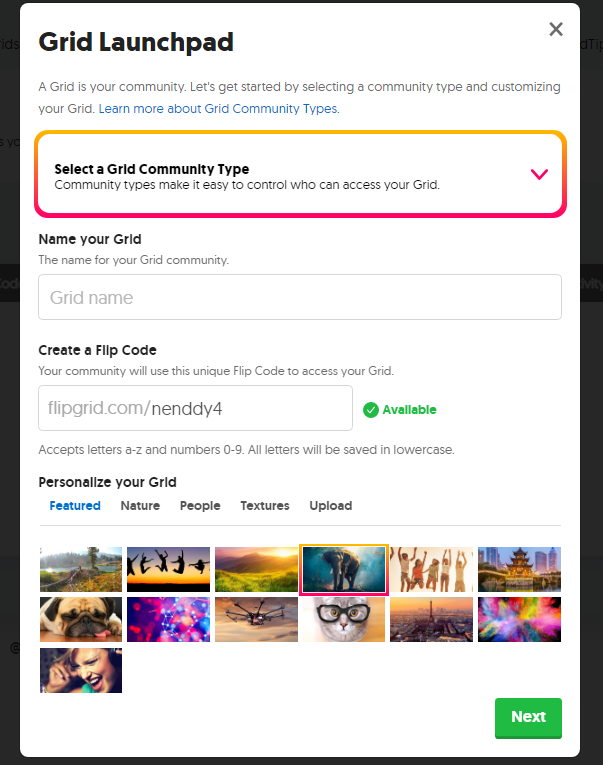 Once you have created the discussion you will need to insert a topic or more. To do so, just click on "new topic" and a screen will open in which you will be asked to fill in a series of fields: -topic details: add title, description and questions, add help for answers and select a maximum time for the creation of the answer videos; -topic privacy; -topic status: possibility to make the topic active, frozen (students can see the videos but not record them), hidden; -topic resource: add videos, images, gifs or emojis; -topic attachments: add external links; -video features: possibility for students to decorate response videos with drawings or stickers or to add external links; -feedback: select the type of feedback. Once all the fields have been filled in, simply click on "create topic" and this will then be displayed in your discussion dashboard, as illustrated in the following screenshot, and you can edit or share the topic and see all the answers related to it.
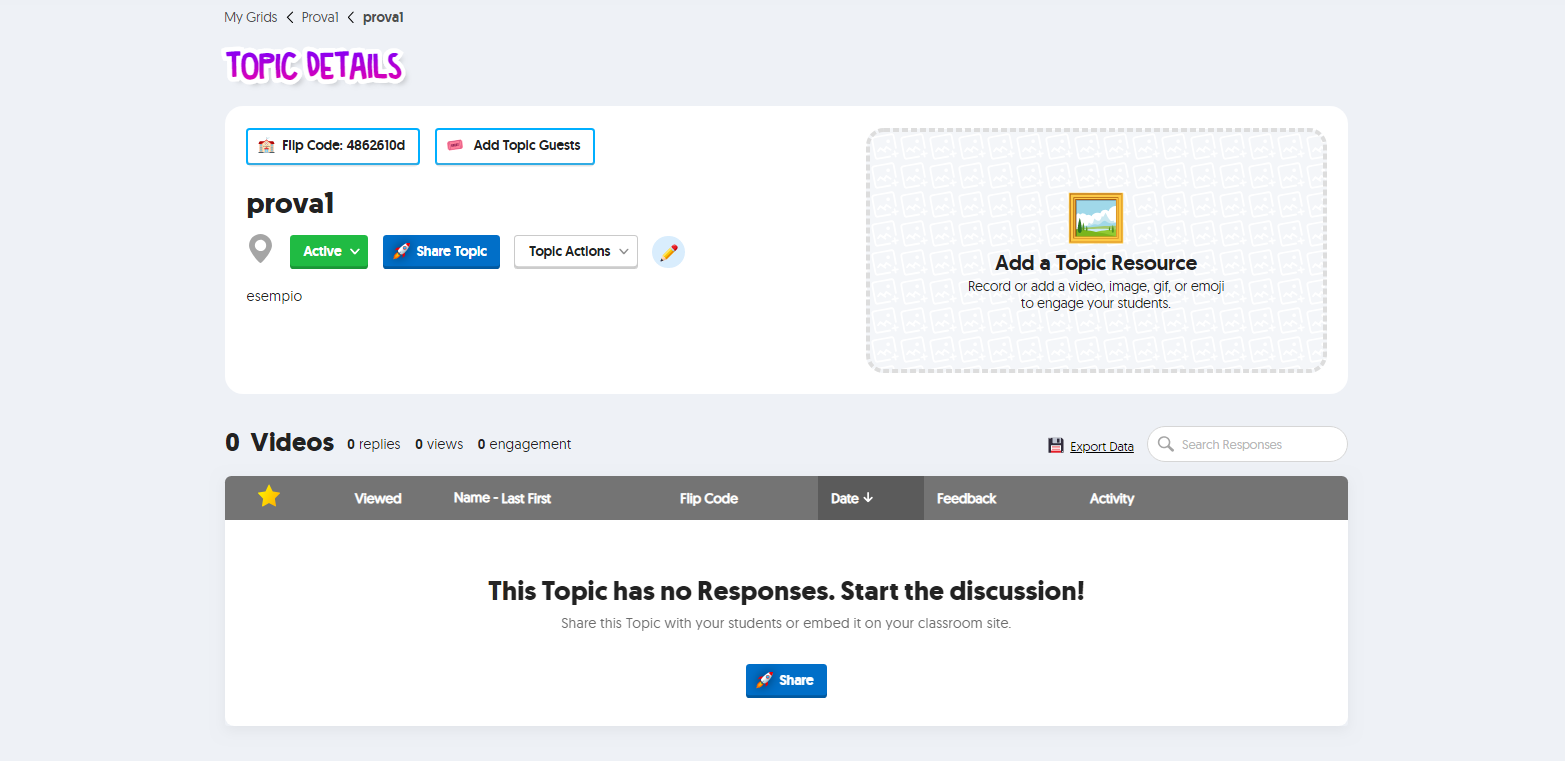


Copy link